
1. What is Carving all about?
2. Learning to carve marble in Italy
3. What’s a ‘bas relief’?
4. Carving Happy to Be Me
-=-=-=-=-=-=-=-=-=-=-=-=-=-=-=-=-=-=-=-=-=-
1. To sculpt, carve:
Making figures or designs in three dimensions; a three-dimensional, free-standing work of art; to shape (a material such as stone or wood); to create by shaping stone or wood or other material (stone, wood, ice, butter, etc.).
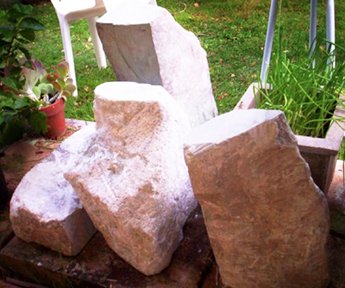
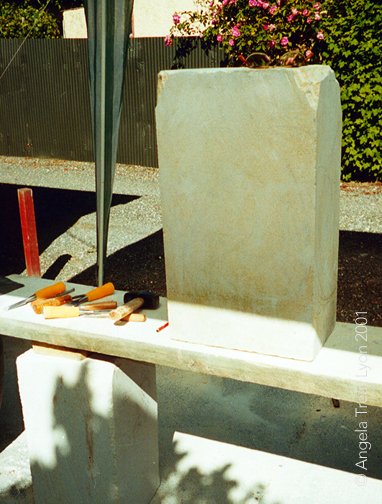 Here you see what I see when I start to carve.
That piece of stone, which was about 24″ x 12″ x 10″, sits on my carving table about 30″ off the ground.
It’s a lovely block of striated Oamaru Limestone, from Oamaru New Zealand.
Next to the block of stone, you can see my little chopped-off 2-pound hammer, and various chisels and rifflers (smaller, finer files for details).
It became one of my very most favorite pieces, I’m Happy to Be Me. Most of my chisels and files were simple wood-carving tools, since Oamaru stone is pretty soft, compared to marble or granite.
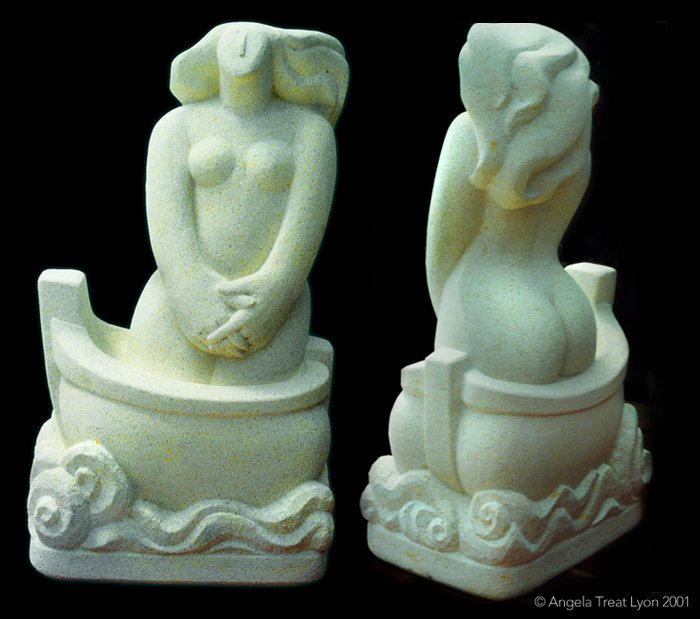
Happy to Be Me
I didn’t have any of my hard-stone tools with me during my stay in Gore, New Zealand in 2001-2, which is where this was taken, so I had to make do with what I had available, which was mostly wood-carving tools from the hardware store! At the time the only power tools I was using there was a grinder to lop off the larger chunks to begin the piece.
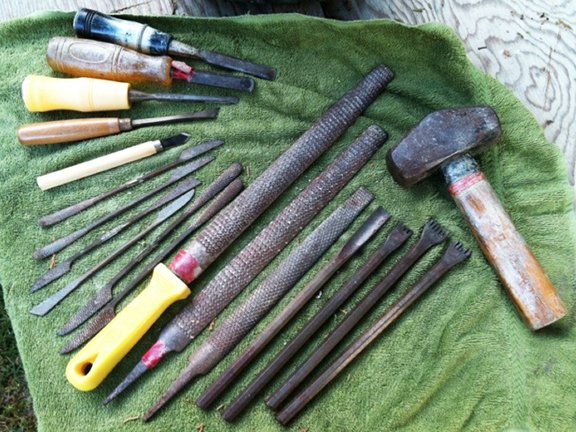
My Soft-Stone Carving Tools, with some Hard-Stone Chisels
You can see in the picture above some of the tools I use for carving softer stone – plus there are a few hard-stone chisels on the lower right. You can also see how I chop my hammer handle short – I have small hands, and if I left it long, it would hit my wrist when I strike the chisels.
Oamaru stone was so soft that if you moved too fast, off came a piece that you didn’t want. So I decided to just take it easy and go slow. Loved it!
I carved all my pieces there by hand, even the 2-ton piece at the symposium at Oamaru. We were only allowed to use power tools in the early mornings when the park was free of tourists – then it was chip-chip-chip by hand till 5pm when we could go back to using power tools again!
See more sculpture out of Oamaru stone HERE.
I started carving when I was still making pots for a living. I’d carve designs in the clay surface, which would collect and pool the glazes to enhance the design.
Below is one of the tiles I carved that had a celadon glaze on it in the last year of my pot making. I carved like that on pots, too – vases, jars, bottles, bowls, platters….
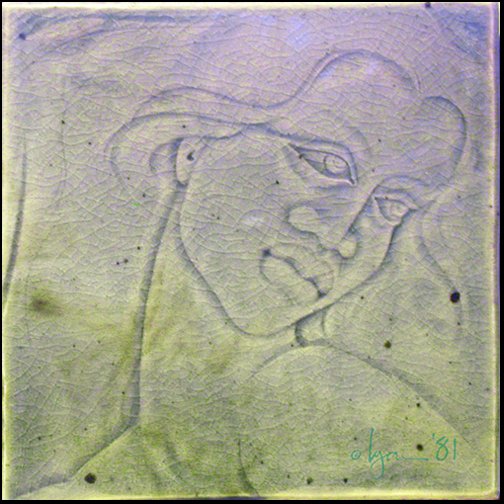
Kane’s Daughter
One day I thought, what am I making pots for? Why not just carve? It was almost prophetic, because not long after that, in the winter of 1982, a friend introduced me to some California soapstone and that was that. Love at first sight.
Stone Waiting to Be Carved
You can see my very first piece HERE.
I carved using only hand tools for 10 years before I felt I was ready for the bite and speed of machine tools.
I wanted to learn the feel of the various types of stone, learn how each one responds to various movement, tool, type of cut; what stone was how hard, came in what colors, could be used for figurative or simple design.
I could probably have gone for the rest of my life without using power tools, but being a pretty impatient person and wanting to see results faster, I felt that I should finally make the shift.
So I went to Italy to learn from a master how to use air tools – tools powered by air, rather than by electricity. I had been using power grinders and polishing tools, but air tools are so much easier. I learned how to carve marble there, as well.
2. Italy!
Lucca, la bella citta!
What an experience!
In 1989, I went with a group of artists that was escorted by painter John del Monte, who had been taking artists to Italy in groups for years in order for them to study with masters.
We stayed in the famed historic walled town of Lucca.
Once upon a time it was actually a capital of Italy. It also was a robber’s town, and now has the distinction of having more banks per capita there than any other town. Go figure….

My teacher, Roberto Bertola
Most of us were experienced carvers, some not, but within a short amount of time our Professore, Roberto Bertola, had us whipped into shape and carving easily with air tools as if we had done it all our lives.
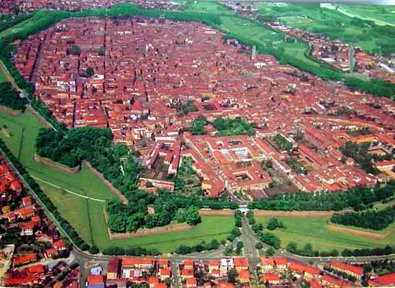
Below is an arial shot of the town of Lucca. Look for the white boxed area – that’s where the little street complex was where most of the students stayed, at Albergo La Luna.
I had the enormous good fortune to get to the hotel and find my room taken, so they gave me a 3-bedroom apartment nearby for the same price!
It was right near the campanile – the bells at the church right across the street. They chimed almost on the hour….

Lucca, la bella citta!
I went to Italy again in 1992, staying in the marble town of Pietra Santa – the town down the mountain from Carrara, where Michaelangelo got his stone for the David, among others. He stayed at the hotel right around the corner from where I was staying.
You can see in the picture below how they named one of the most prominent bars after him!
It was so wonderful to go to the piazza every morning to the bar* and look up to see the name Michaelangelo on the building right there, knowing he had been there, carved in this very town, walked these very streets!

Pietra Santa Evening
This time I studied with another maestro, Leo Muti. I was with one of stone-carver Lynne Streeter’s groups. I’m not usually a group kinda gal, but this time it was great to go with a group. You got studio space for lots less than if you were alone, and feedback and ideas every day that wouldn’t ordinarily be there if you were solo. The hotel fees were less, as well, with the group discount. Besides, it’s just more fun!
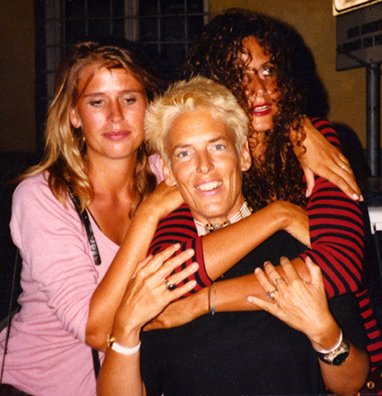
ATL with friends Marion and Gwen in Lucca
* In Italy, a bar is not always an alcohol-serving establishment. It is an eating place – from a tiny one-person counter stuck in a niche in an outside wall to a large restaurant-sized place – where you order at a bar, get the food, and then go sit at an outside table, or if in a hurry, stand at the bar to eat.
Took me a while to get used to going to a “bar” for my meals!
I was very fortunate to meet some of the most wonderful people in Italy – here is Marion and Gwen and me – we all stayed in that big apartment in Lucca together.
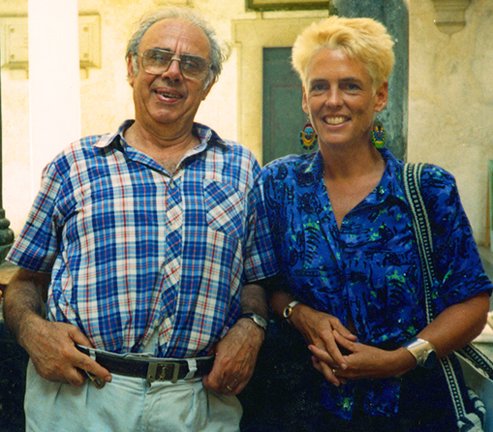
ATL with Sculptor Marcello Tomasi in Pietra Santa 1989
And here I am with Marcello Tomasi, a well-known and respected sculptor in Pietra Santa.
At his studio ha had some of the most powerful figurative pieces I’ve ever seen – both he and his father were sculptors.
There was sculpture everywhere in there! Sculpture in the corners, in the passageways and on tables and heavy lifters, stacked outside, and under tables and on shelves – a lot of it was there gathering dust from before WWII. He worked in both stone and bronze, and showed me his foundry – just as stacked up!
3. Bas Relief:
A bas relief is a sculpture that, rather than being three dimensional and standing on its own, is carved or cast so that it stands out from a surrounding background.

Relax Mt. Somers
This is Relax, carved out of Mt. Somers stone from New Zealand. It’s a lot like Oamaru Stone, but is a bit harder, and has a finer texture..
Carving in bas relief is one of my favorites things to do. There’s something about making a flat piece of material look three dimensional that just gives me a kick!
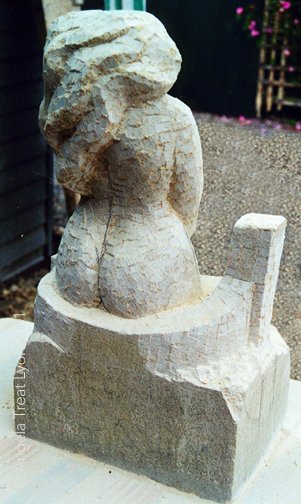
4. Carving Happy to Be Me

Carving Happy to Be Me 1
On this page I’m putting just a few pictures of carving this piece – you can see all 10 start to finish images HERE.
First, I draw the approximate locations of the various design elements on the stone with a hard, fat, red sculpture crayon.
Then I use my angle grinder to cut that hunk out of the left side which would be all air when the piece was done.
Then I go at it with three-quarter, half-inch, and finally quarter-inch chisels.
Lopping off the long end of the hammer allows me to have more wrist action without the end of the hammer brushing against the inside of my wrist.

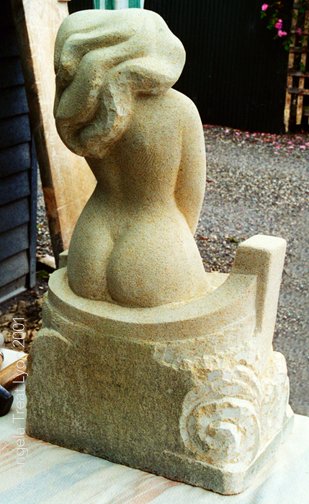
Carving Happy to Be Me 2
Here it’s about one-third through.You can see my crayon marks, and how I’m carefully keeping her center line intact.
At the end, I made it so she leaned to her left a bit to create visual tension.
The elements have been shaped out, and now I can step back and see if I want to make any major changes.
You can see how tall the prow (front part) of the boat is now.
Later, I chopped that part that sticks up off and made it shorter – it just seemed too tall for the boat, and was distracting from the overall look and feel.
Next step is to rough out the boat. I had originally planned to make it pretty detailed with planks and a deep inner view, but it was better to keep it simple.
Carving Happy to Be Me 3
Sometimes details steal the power of the essence of a sculpture, and you have to be constantly aware to keep from letting that happen.
And at this point, I hadn’t even started the water.
I wanted to make sure the figure was right before I did anything else – then I could be assured that I wouldn’t have to go back and shorten her or move her around at all.
Usually I work a piece all over to keep consistent style and movement. But this one seemed to have its own logic.
You can see how, in the fourth picture, the figure is almost done, and the water has barely begun to be roughed out.In the end, I left the water very coarse, because through texture, I wanted to convey rhythm, movement and action!
Carving Happy to Be Me 4
To finish the surface of the piece, instead of filing it smooth and using smaller and smaller grade sand paper, I only used files and rifflers (very small files that had little tiny teeth) and no sand paper at all on the figure.
When I studied in Italy, I saw that the maestros were really careful not to make skin too smooth – you have to be careful not to over-polish.
The skin on a human isn’t shiny and smooth like metal, why would you want a sculpture to be?
Now you can see that it’s just short of softly finished.
You can see the finished piece at the top of this page – peace and tranquility – just cruisin’ in my little boat, happy to be me!
.
.
.